Chapter 5. Auto-discovering nodes on network
In order to quickly setup monitoring on a IP-address range you can use the auto-discovery feature of SysOrb. This will add all newly found nodes to the current domain and enable the checks you have choosen in to scan for.
In order to initiate an auto-discovery, do the following:
-
Select to the left in order to goto configure mode
-
In the tree that appears, choose the domain in which to add the nodes found during the scan, by clicking on the domain name.
-
Select at the bottom of the page
-
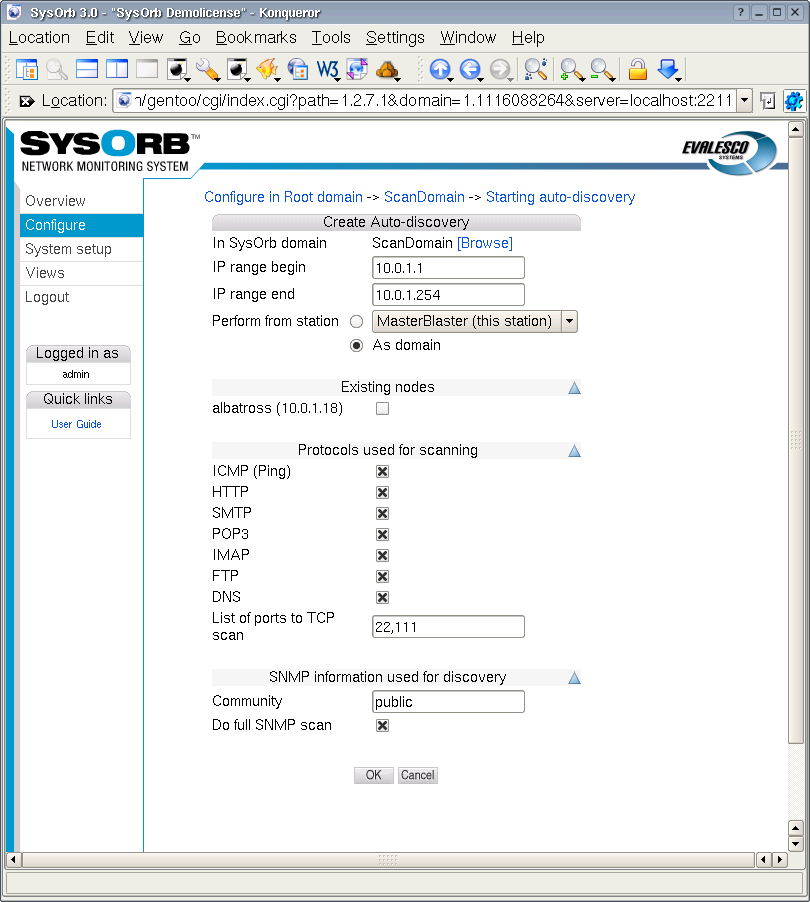
You will now see the auto-discovery startup page as shown below:

-
Fill in the requested information:
-
In SysOrb domain: This domain is where the newfound Nodes will be created. It also influences which NodeClasses is considered, when SysOrb is automatically assigning classes based on the services provided by each node. Basically SysOrb only considers NodeClasses belonging to the selected domain, or one of its ancestors up to the root domain.
-
IP range: If you want to find machines not yet created in SysOrb, then you should give an IP range for SysOrb to scan. Both endpoints are included in the scan.
Default value: 254 IP addresses around the address of the SysOrb server
-
Existing nodes: If you want to automatically set up NetChecks and NodeClasses on some Nodes already created in SysOrb, then you can check them here. Note that you cannot both enter an IP range and some existing nodes, if you want to do both, you must start two separate auto-discoveries.
-
Protocols used for scanning: SysOrb will discover nodes by trying to contact each IP address in the given range on each of the protocols selected in this field. If a node responds to one of these protocols, the node will be created in the domain, and a NetCheck will be configured and activated on the node.
-
SNMP Community: Nodes running a SNMP Agent will typically provide information about their brand and model, this can be used to automatically assign the nodes to very specific NodeClasses. In order for the SNMP Agent to reply to SysOrb's requests for information, SysOrb must know the (read only) community of the SNMP agent, which you can enter here. If you leave this field blank, no SNMP detection will take place.
Default value: public
-
-
Click the button to start the auto-discovery.
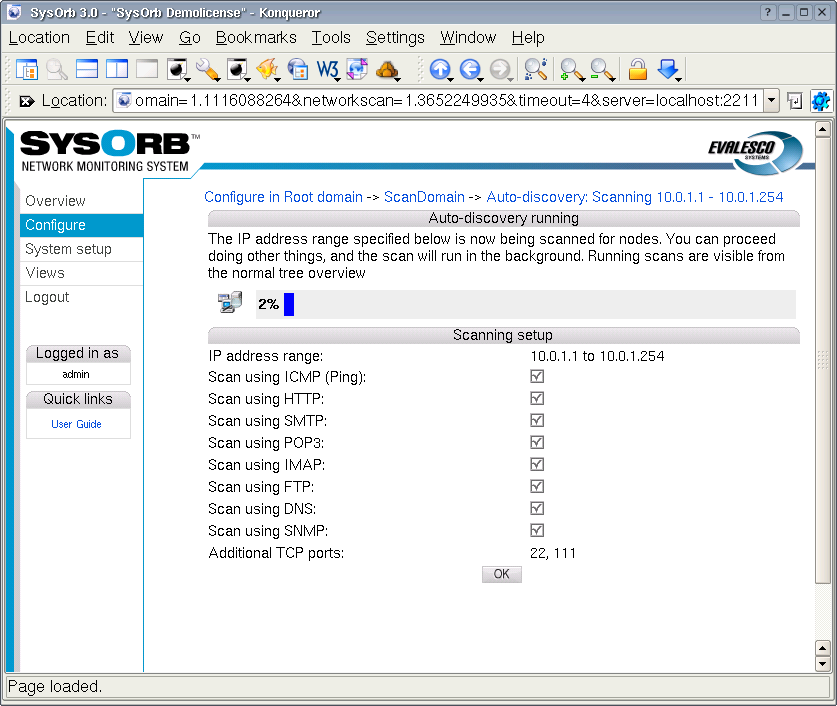
You wil now see a page showing the setup and progress of the scan. You can at any time select to do other things, the scan will continue to run in the background until done. In order to check the progress again just click the auto-discovery icon that has appeared in the domain you created the scan. Make sure to be in configuration mode by selecting on the left.
