Chapter 3. User management
- Table of Contents
- 3.1. Domains
- 3.2. Users
- 3.3. Preferences
- 3.4. Paths
- 3.5. Groups
As mentioned in Chapter 1 the SysOrb Network Monitoring System relies on domains, groups and paths to notify the right persons about warnings and alerts. Whenever an alert is caused by a machine in a domain, a group will be alerted and messages will be sent to every one of that group's paths.
3.1. Domains
To properly manage the use of domains in SysOrb you need to know or decide a few things about the part of your network you wish to configure as a domain.
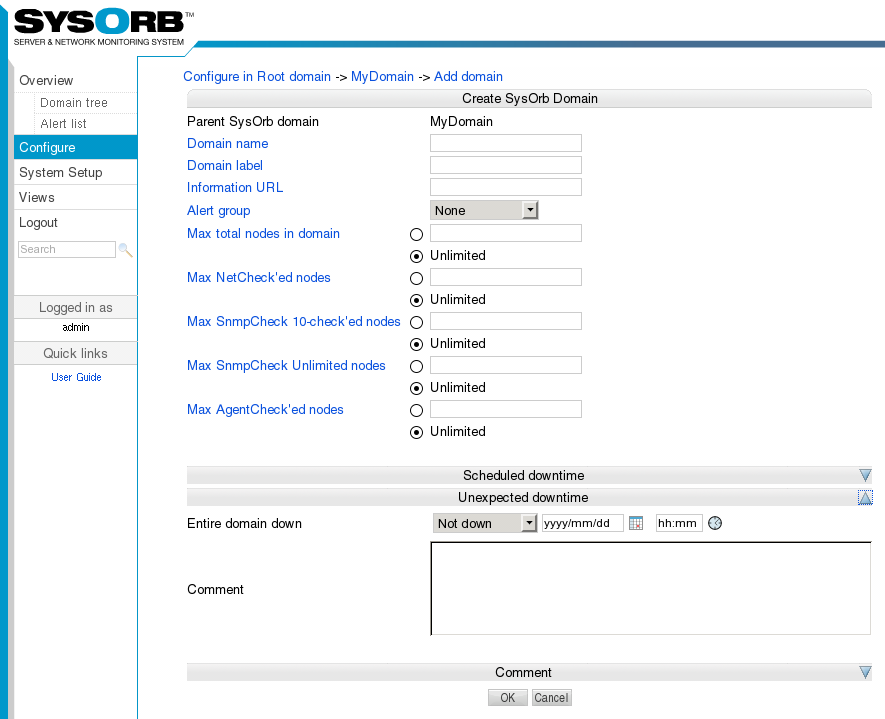
Most of the following options concern the maximum allowed number of various things in the domain. This is only relevant if multiple administrators work in different domains, and the super-administrator wants to impose limits on the number of resources each of the lesser administrators should dispose of. Every limit should be interpreted as a bound on the number of nodes in this domain and all of its subdomains, the subdomains may themselves have limits, but still the constraints on the outer domain will be enforced. The limits on the outermost domain is ultimately determined by the license, and of course cannot be set by any administrator.
-
Domain name: this is the name by which you will know the domain. We recommend using human-understandable names like "Development", "Marketing" or well defined abbreviations. Please note that domain names are no longer case sensitive.
-
Domain label: in addition to the name of the domain you can have a label that will be shown in the overview along with the name.
-
Alert group: a group that should be alerted if when something is in a bad state on this domain. E.g. in order to send an email to a specified address when something goes wrong.
Possible values: None, As domain, AlertGroupX, AlertGroupY,...
Default value: None
-
Information URL: if you have additional documentation regarding this domain for the operators, you can supply an URL here, and SysOrb will show a link to the documentation on the various listings where this domain appears.
-
Max total nodes in domain: this is the maximum number of nodes allowed in the domain. Both SysOrb Agents and nodes with only NetChecks count toward this number.
If set to Unlimited any number of nodes can be created in this domain.
-
Max NetCheck'ed nodes: this is the maximum number of nodes in the domain, that can be monitored using NetChecks. Note, however, that an AgentCheck'ed host can also be monitored using NetChecks without counting towards this limit.
If set to Unlimited any number of nodes may be NetChecked, while observing the above limit on the total number of nodes, as well as any limits on outer domains.
-
Max SnmpCheck 10 nodes: this is the maximum number of nodes in the domain, that can be monitored using up to 10 SnmpChecks. Note, however, that an AgentCheck'ed host can also be monitored using SnmpChecks without counting towards this limit.
If set to Unlimited any number of nodes may be SnmpChecked with up to 10 checks, while observing the limit on the total number of nodes, as well as any limits on outer domains.
-
Max SnmpCheck Unlimited nodes: this is the maximum number of nodes in the domain, that can be monitored using an unlimited number of SnmpChecks. Note, however, that an AgentCheck'ed host can also be monitored using SnmpChecks without counting towards this limit.
If set to Unlimited any number of nodes may be SnmpChecked, while observing the limit on the total number of nodes, as well as any limits on outer domains.
-
Max AgentCheck'ed nodes: this is the maximum number of SysOrb Agents that are allowed to check in to the new domain on the SysOrb Server. This option is useful for controlling how many SysOrb Agent licenses a given domain can use.
If set to Unlimited any number of hosts can check-in to this domain, while observing the limit on the total number of nodes, as well as any limits on outer domains. This also means that it would be possible for an administrator of this domain to use up all the AgentCheck licenses.
-
Scheduled downtime: Some node are only used in certain periods, for instance during working hours. SysOrb can be instructed only to send warnings and alerts during these periods. It will still perform the checks around the clock for statistical purposes, just not send warnings or alerts outside working hours. Setting the scheduled downtime of a domain, will pass the scheduled downtime on to any machines (or subdomains) in the domain. So this is an easy way to have downtime configured the same way for many nodes..
You configure this by specifying all the time intervals of the week, for which SysOrb should not send warnings or alerts. For instance if you want SysOrb to monitor the domain from 8 am to 4 pm every workday, you would add downtime intervals from 0:00:00 to 8:00:00 and from 16:00:00 to 23:59:60 on each of Monday to Friday, and one interval from 0:00:00 to 23:59:60 on Saturday and Sunday.
-
Unexpected downtime: When SysOrb detects a problem with many machines in a domain (e.g. due to a router failure), you sometimes know that someone will deal with it at some specific later time. You do not want to be flooded with SysOrb messages until then. In that case you can use these fields to instruct SysOrb not to send any warnings or alerts regarding all nodes in this domain until some later point in time.
Using the drop-down box labeled Domain down you can select that all the nodes in the domain will be down for 1, 3, 6 or 24 hours. You can also select the option named "Until", and enter a date and time in the text field to the right.
When enabling unexpected downtime you can choose to let SysOrb send a notification to anyone ordinarily receiving warnings or alerts regarding this node. This is accomplished using the Notify group drop-down box.
3.1.1. Adding domains
To add a new domain, do the following:
-
Select from the navigation buttons at the left.
-
Click you way through the domain tree until you have selected the domain under which you wish to create a new domain
-
Press the button.
-
Fill out the information about the domain as described above.
-
Press the button to accept the new domain or the button to cancel.
3.1.2. Editing domains
To change the options for a domain, do the following:
-
Select from the navigation buttons at the left.
-
Click you way through the domain tree until you have selected the domain where the domain you wish to edit is located.
-
Select the option for the domain you wish to edit.
-
Change the options for the domain.
-
Press the button to accept the changes or the button to discard the changes.
3.1.3. Deleting domains
To delete a domain, do the following:
-
Select from the navigation buttons at the left.
-
Click you way through the domain tree until you have selected the domain where the domain you wish to delete is located.
-
Click the link to the right of the domain.
-
You will be asked to confirm the deletion of the domain. Press the button to delete the domain or to keep the domain.
3.1.4. Domain representation
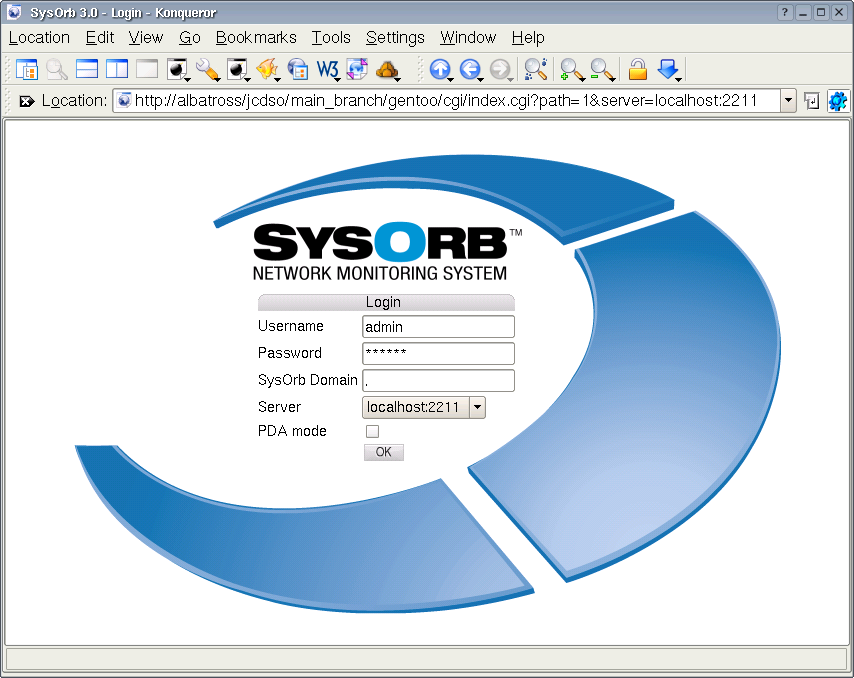
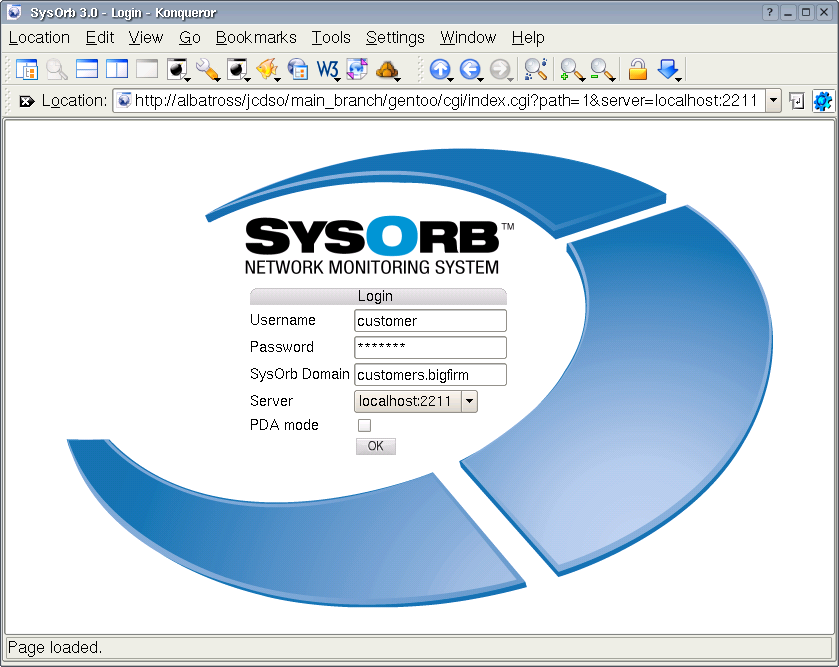
When you are just using the Web-interface, you normally won't need to know how to represent a path to a domain in text. This is however nessesary when you configure the SysOrb Agent, or when you wish to log in to a subdomain. The root domain is represented as a dot ("."). A subdomain to the root domain, is represented by it's name alone (eg. "world"). Subdomains to this domain is represented by all the names from the parent domain, separated by dots with the outermost domains to the left (eg. "world.continents.europe").
3.1.5. Quick links
Quick links makes it possible to add links to the navigation bar on the left in the web interface. The URL's associated with the links can contain special variables that will get substituted with appropriate values. E.g. the link http://www.helpdesk.com/index.cgi?node=$node$ will have the $node$ part substituted with the id of the current node.
Quick links are associated to a domain. Every user of this domain can see these links. Users in subdomains can only see the links if the links have been marked Visible in subdomains.
A Quick link has the following properties:
-
Quick link name: This is the name that will be shown in left bar in the web interface.
-
URL: This is the URL that the link should point at. The URL can contain variables that will get substituted as decribed above. There are several variables is defined, but the most useful ones are: $domain$, $user$, $node$ and $version$.
-
Visible in subdomains: This checkbox indicates whether the link is visible for users in subdomains of this domain.
For Adding, editing and deleting a quicklink use the following steps:
-
Select from the navigation buttons at the left.
-
Click you way through the domain tree until you have selected the domain where the domain you wish to add links to is located.
-
Select the option for the domain you wish to edit.
-
Select the button to list the currently available quick links.
-
Select the button to get to the link creation page. Select next to a existing link in order to edit it. Select next to a existing link in order to delete it.
-
When adding or editing a quick link. Fill the properties as described above and click .